
New retro battlestation: Lenovo Thinkpad X60
After the previous retro battlestation and its OpenBSD adventure, I wanted to try something a little more capable. Still old, still interesting, but with enough memory and processing power to do more than struggle with the installation of a browser.
Enter the Lenovo ThinkPad X60. Its name at home is canica: a small marble, which seems appropriate for this little machine.
The idea was to combine Windows XP, some usable Linux distribution, and the two BSDs I wanted to explore. Getting there involved USB installers, an OEM licence, a rather unhelpful optical drive, some partition arithmetic, and one particularly annoying discovery under the heatsink.
Eventually, we got four operating systems booting from the same mechanical disk. Let’s go through the journey.
The configuration and package versions below describe the machine as of 12 September 2026. Network names, addresses and personal account names in the examples have been replaced. RETRO_WIFI, retro, and the 192.0.2.0/24 documentation network are placeholders; canica is the real name of the laptop.
The laptop
When was the X60 released?
Lenovo announced the X60 series on 5 January 2006, with availability starting in February 2006. There is a small trap in the archived Lenovo announcement: the page header says 2007, but the press release itself is explicitly dated January 2006. Announcement date and shop availability are also two different things.
This was the Core Duo generation, after Lenovo’s acquisition of IBM’s PC business. It still gives me much of what I like about these ThinkPads: a compact case, a proper keyboard, TrackPoint, and a 4:3 screen.
The photograph of my unit’s label appeared to show 06/11. We interpreted that as November 2006, using the usual year/month convention. I am keeping that as a likely manufacturing date, rather than pretending the serial number independently proves it.
Technical specifications
These are the specifications relevant to this project. In particular, this is an X60 with a Core Duo, not an X61 and not an X60 Tablet.
| Component | Specification |
|---|---|
| Processor | Intel Core Duo T2400, 1.83 GHz, two cores, 2 MB L2 cache, 667 MHz front-side bus |
| Architecture | 32-bit x86; SSE2 is available, Intel 64 is not |
| Chipset and graphics | Intel 945GM, integrated GMA 950 graphics |
| Internal display | 12.1-inch XGA, 1024×768, 4:3 |
| Memory | DDR2 SO-DIMMs; approximately 3 GB usable on this platform |
| Internal storage | 2.5-inch SATA drive |
| Ethernet | Intel Gigabit Ethernet; wm0 in NetBSD and em0 in OpenBSD |
| Wireless in this unit | Intel PRO/Wireless 3945ABG; wpi0 in both BSDs |
| Wi-Fi standards | 802.11a/b/g, up to 54 Mbit/s link rate; not 54 Mbit/s of file-transfer throughput |
| Audio | Intel HDA with Analog Devices AD1981HD codec |
| Other connections | USB 2.0, VGA, Ethernet, modem, audio, CardBus, SD reader and IEEE 1394 |
| Optical drive | External to the laptop itself; available through the X6 UltraBase |
The Lenovo hardware maintenance manual is the useful reference when identifying parts or opening the machine. It also makes an important distinction between system boards fitted with different processors.
This particular unit
The machine was advertised as 1707-CTO, with another label reference to 1707-WTL, a T2400, 1.5 GB RAM, and no fingerprint reader. It arrived with two RAM modules: 512 MB and 1 GB. I bought a 2 GB module on eBay for €16 and replaced the included 512 MB module, keeping the original 1 GB module. That brought the final working configuration to 3 GB RAM.
I kept the seller-supplied Fujitsu MJA2160BH G2, a 160 GB rotating SATA disk. It is quiet enough that I initially wondered whether it was an SSD. Linux reported:
Disk /dev/sda: 149.05 GiB, 160041885696 bytes, 312581808 sectors
That is the same capacity expressed in binary units, not missing space.
The BIOS originally reported 1.09, dated 27 July 2006. We successfully updated it to 2.19. SATA remains in Compatibility mode for the XP installation described below.
The protruding battery identifies itself as 42T4632. Its reported design energy was 74.88 Wh, with 36.66 Wh remaining at full charge: about 49% of its original capacity. Linux reported zero cycles, which did not agree with the non-zero figure I had seen under Windows. That counter was not a useful indication of battery health.
I also checked for a SIM holder under the battery and found none. Although we discussed WWAN options, no mobile broadband upgrade became part of this build.
Where it came from
I bought this X60 second-hand on 9 August 2026 for €90, with the 160 GB mechanical disk. That was my purchase price for this particular used machine. Keeping that disk was a deliberate choice; this project did not need an SSD purchase to get started.
The dock was a separate eBay purchase: an X6 UltraBase, 42W4635, supplied with a CD-RW/DVD drive and a 65 W power supply. The final price, including the seller’s offer, was €31.74. This is the original listing.
The optical drive eventually identified correctly under XP as MATSHITA DVD/CDRW UJDA775. The UltraBase also gives this small laptop the legacy connections needed for experiments such as the parallel-port Iomega Zip drive.
The CPU upgrade that never happened
This part deserves to be recorded because it changed the entire software plan.
I had been advised that I could replace the T2400 with a Core 2 Duo T7200, as I had done with another ThinkPad. The plan was to gain 64-bit support and install Debian 13 amd64. I specifically asked about the X60, but the advice was wrong.
After disassembling the machine and removing the heatsink, I found the processor soldered to the motherboard. There is no socketed CPU swap to perform on this X60.
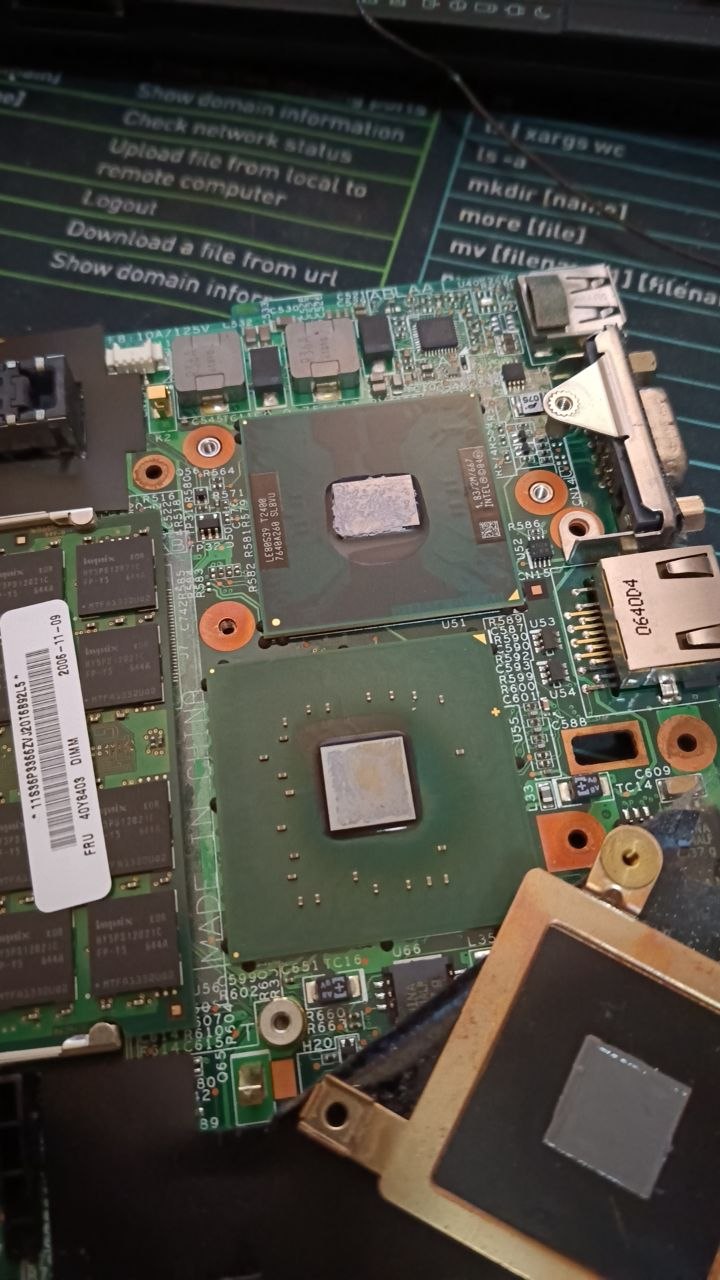
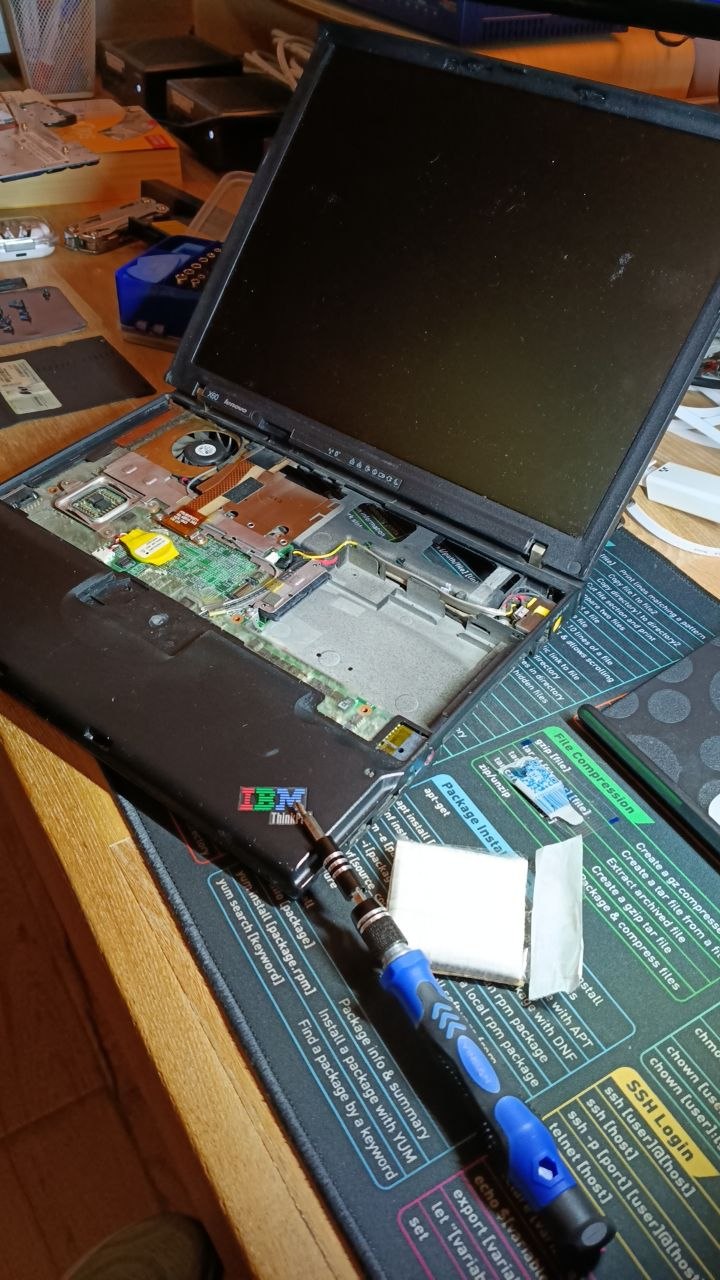
The laptop was cleaned and reassembled successfully, including the fan area, but it still had its T2400. This disassembly and cleaning happened later in the project, after the Windows XP installation and the temperature problems we encountered during it. Although I am describing the hardware work here, it was one of the last things we did. The cleaning drastically improved the temperatures, so the exercise did bring a worthwhile improvement even though the CPU upgrade was impossible.
The useful lesson is quite concrete: processor-family compatibility does not establish whether a particular laptop has a replaceable processor. Check the actual system board and maintenance manual before buying parts or removing screws.
So, the final four operating systems would all be 32-bit.
Four systems on one MBR disk
The disk layout evolved while we were first installing Debian 12 and then replacing it with antiX. We kept XP at the beginning, Linux inside an extended partition, and reserved the remaining two primary MBR entries for the BSDs.
| Linux name | MBR type | Size | Use |
|---|---|---|---|
/dev/sda1 |
07 |
20 GiB | Windows XP, NTFS |
/dev/sda2 |
05 |
65.7 GiB | Extended partition containing Linux |
/dev/sda5 |
83 |
488 MiB | antiX /boot
|
/dev/sda6 |
8e |
65.2 GiB | LVM physical volume for antiX |
/dev/sda3 |
a9 |
32 GiB | NetBSD |
/dev/sda4 |
a6 |
31.38 GiB | OpenBSD |
The LVM space is a container, not the size of the Linux root filesystem. The layout we reused had an 18.6 GiB root LV and a 1.9 GiB swap LV, leaving room in the volume group for later expansion. Each BSD has its own root filesystem and swap area.
For reference, the primary partition boundaries recorded during installation were:
Partition       Start sector    Sector count
Windows XP                63        41942817
Extended            41943038       137717762
NetBSD             179662848        67109304
OpenBSD            246772152        65809656
These are the boundaries of this disk, not a partitioning script to copy onto another computer.
antiX owns the main GRUB installation in the disk’s MBR. Each BSD installs its own boot code inside its partition. The result is:
X60 BIOS
  -> antiX GRUB
       -> Windows XP
       -> antiX
       -> NetBSD partition boot code -> NetBSD
       -> OpenBSD partition boot code -> OpenBSD
Windows XP Professional SP3
Getting the installer to run
We started with Spanish Windows XP Professional SP3 media and Ventoy. It was not a straight path to the desktop.
At this point the laptop had not yet been disassembled and cleaned, and we had temperature problems while installing XP. The cleaning described in the hardware section happened later and drastically improved those temperatures. The sections here group the work by topic, rather than following a strict chronological diary.
The first obstacle was:
STOP: 0x0000007B
XP did not have the storage driver needed for the BIOS’s AHCI setting. Switching SATA to Compatibility mode addressed that part of the problem, but Ventoy still did not give us a reliable installation path.
The successful approach used WinSetupFromUSB 1.10 on another Windows machine and a dedicated 8 GB USB stick. With the XP image mounted or extracted, its contents were selected as the Windows 2000/XP/2003 source. The resulting menu had separate entries for:
First part of Windows XP Professional SP3 setup
Second part of Windows XP Professional SP3 setup / boot first internal disk
We used the first for text-mode setup and the second after the reboot into graphical setup. The WinSetupFromUSB project is the reference for this tool.
There were failed formatting attempts, a temporary D: instead of C:, and sudden power-offs. On a later attempt the same 20 GB partition appeared as C: and completed a full NTFS format. The power-offs also occurred outside Windows, including in the BIOS while the laptop was hot, so they could not sensibly all be blamed on XP. We did not establish a single proven cause for every shutdown.
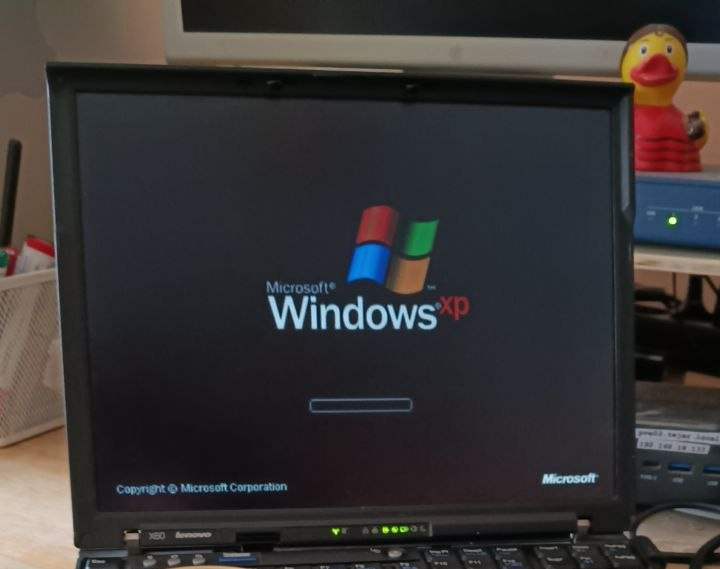
Matching the installation media to the licence
The next problem was an apparently invalid product key. The label on the laptop was for Windows XP Professional OEM, while the first media we tried belonged to a different licensing channel.
We inspected I386\SETUPP.INI and the disc markers. The successful Spanish SP3 source included:
WIN51
WIN51IP
WIN51IP.SP3
Its SETUPP.INI identified OEM media. With the matching installer, we used the Windows XP licence key printed on this laptop’s own label to activate XP on this same unit. The key was accepted, and activation was completed through Microsoft’s web-assisted process. Neither the key nor the activation identifiers belong in a blog post.
Drivers and ThinkVantage
The first desktop had nine unknown devices, including graphics, Ethernet, wireless and audio. Fortunately, the SD card reader worked, so it became the way to transfer the drivers downloaded on another computer.
We worked through Lenovo’s archived X60 drivers, starting with the chipset and basic connectivity, then graphics, audio, wireless, modem and the remaining ThinkPad-specific devices. Hardware IDs made the last three mysteries much easier:
| Device ID | What it identified |
|---|---|
PCI\VEN_8086&DEV_4227 |
Intel PRO/Wireless 3945ABG |
ACPI\ATM1200 |
TPM/security-chip device |
ACPI\IBM0068 |
ThinkPad power-management interface |
One confusing detail was Power Manager versus the Power Management driver. Installing the graphical utility and seeing its taskbar icon did not mean the ACPI device driver had been installed. The ghu704ww.exe package was the utility; we eventually located the separate gtku09ww.exe driver.
After the final restart, Device Manager had no pending drivers. At that point, C: contained about 5.35 GB of files.
ThinkVantage System Update 3.16 needed .NET before it would install. We encountered both a small web installer and the much larger offline .NET 3.5 package; an initial connection complaint from the latter did not ultimately prevent installation. System Update then ran, but returned no updates, and later attempts to use its old service were not reliable. That was a reason to verify individual drivers, not evidence that the old service still knew everything about the machine.
The BIOS update to 2.19 succeeded from Windows. Switching SATA away from Compatibility afterwards caused XP to blue-screen again. We reverted the setting rather than treating a BIOS option as an automatic driver migration.
Applications and old peripherals
Three useful additions were Supermium, PuTTY and MobaXterm. I confirmed installing all three, and later confirmed that Supermium was working.
| Application | Role in this installation |
|---|---|
| Supermium, 32-bit | A more capable browser for XP |
| PuTTY | SSH sessions and remote terminal work |
| MobaXterm | Remote access with an integrated X server |
| Microsoft Office Home 2007, Spanish | Office applications, installed with a valid licence |
| ThinkVantage System Update and Power Manager | Period Lenovo administration tools |
The versions proposed for that installation were PuTTY 0.84 x86 and MobaXterm 26.4 Portable; the conversation confirms installation of the three applications, but does not include an About-dialog check of each version. For future downloads I would check the upstream compatibility notes again.
We discussed additional editors and mail clients too, but discussing an application is not the same thing as installing and testing it. In particular, remote X applications and modern mail authentication still deserve their own tests.
The dock’s optical drive was intermittent. It disappeared from XP at one point, then returned after a Device Manager rescan as MATSHITA DVD/CDRW UJDA775. We used it to install Office. Under the earlier Debian installation, its identification was sometimes corrupted:
ATAPI: DVD/BDRW UJD@765, BB03
model number mismatch
revalidation failed (errno=-19)
Reseating and boot-parameter experiments did not establish a dependable Linux fix. USB and SD transfers therefore remained important throughout the project.
The parallel-port Iomega Zip drive, on the other hand, produced a very satisfying result in XP: I inserted a disk and copied files from it without installing IomegaWare. That is one very practical reason to keep this Windows partition.
Audio initially worked through headphones but not through the internal speaker, under both XP and Linux. That made a speaker, connector or jack-detection problem more plausible than a single OS driver problem. Later BSD playback tests succeeded, but the record does not identify a separate internal-speaker repair.
Updating XP: Legacy Update and Office
We installed Office Home 2007 using a valid licence, then applied the Spanish Office 2007 SP3 package manually:
office2007sp3-kb2526086-fullfile-es-es.exe
Word then reported:
Microsoft Office Word 2007 (12.0.6612.1000) SP3 MSO
With SP3 installed, we collected individual post-SP3 updates from Microsoft’s download service and Update Catalog, and looked into extracting CAB archives and applying the contained MSP patches manually.
After that, we used Legacy Update. It correctly installed all the remaining Office patches without any effort on our part beyond the normal update process, so the manual CAB/MSP drill was unnecessary. The order was Office installation, manual Office SP3 installation, then Legacy Update for the remaining patches. That completed the Office patching work as well as the Windows updates.
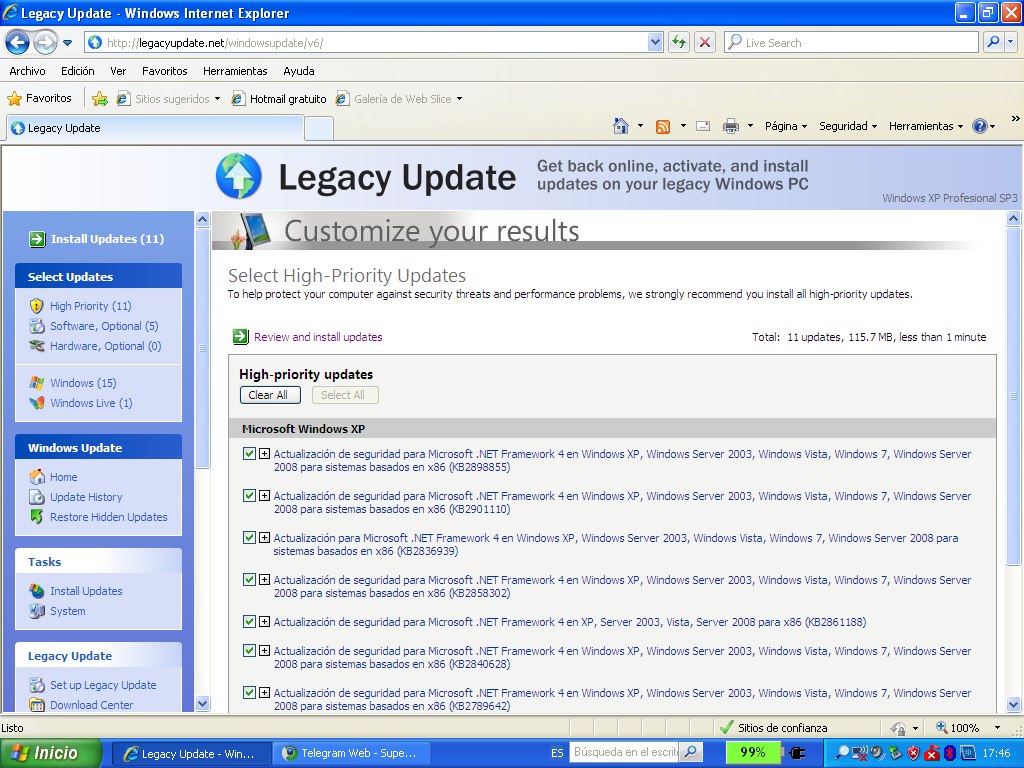
Legacy Update restores access to legacy Windows updating infrastructure and helps install the updates that are still available for these old systems. It does not turn XP into a supported modern operating system or make every retired Microsoft service work again.
With XP Professional SP3, the correct drivers and Office SP3 already installed, the maintenance routine for this machine is:
- Run Legacy Update from its official site and allow any required components to complete.
- Scan for applicable Windows and Office updates, install them, and reboot when requested.
- Repeat the scan after rebooting until no applicable updates remain; prerequisites can make further updates appear.
- Check separately installed applications against their own XP-compatible releases.
- Keep copies of the working installers and a backup of the restored system.
Two limits showed up in our own experiments. Windows Live Essentials could still fail when trying to reach retired services, even when the installer looked like an offline package. Microsoft Security Essentials and its definition-update path were also problematic. I would not describe either as restored merely because Legacy Update itself worked.
antiX 26
Replacing Debian while keeping the useful layout
Debian 12 i386 was our first Linux installation. Installing GRUB with the original all-LVM arrangement failed, and a separate /boot became part of the working layout. The reason for choosing antiX 26 Full 32-bit for the permanent Linux slot was the future of 32-bit support. Debian 12 is available for i386, but Debian 13 no longer provides a standalone i386 installation: it has no official i386 kernel or installer, as explained in the Debian 13 release announcement. Its remaining i386 support is for running 32-bit software on amd64 systems, which does not help this 32-bit-only T2400. Once the proposed 64-bit CPU upgrade proved impossible, antiX gave us a Trixie-based system with its own 32-bit kernel and installer.
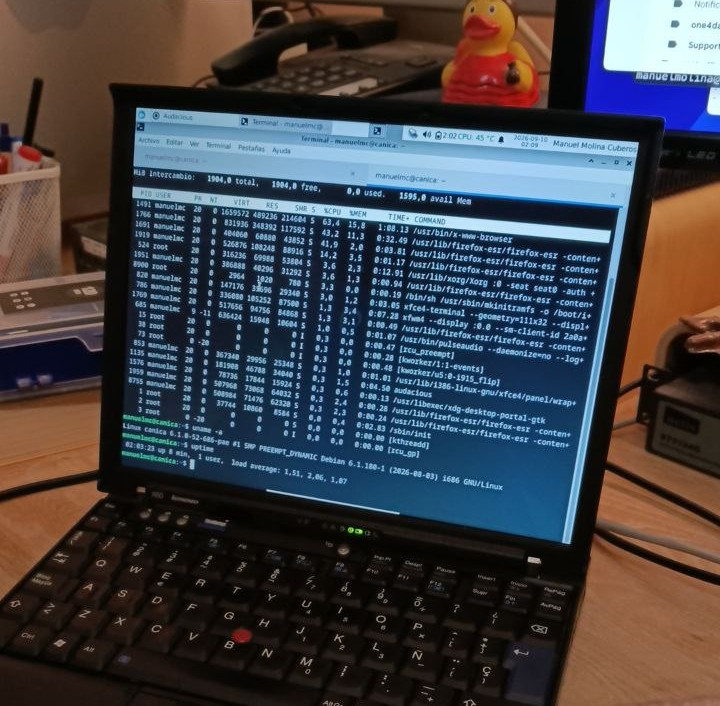
antiX 26 is based on Debian Trixie and supplies its own 32-bit installation path. We used runit, with IceWM for the desktop. The running kernel recorded in our session was:
5.10.240-antix.1-486-smp
I first tried the smaller Core image. Its CLI installer did not offer the separate /boot arrangement I wanted to keep, so we switched to the Full image and its graphical installer, minstall.
Another obstacle: the installer could see LVM2_member, but not the root and swap logical volumes. The live environment did not have pvs, vgs or lvs. Installing LVM tools there solved it:
sudo apt update
sudo apt install lvm2
sudo vgchange -ay
sudo pvs
sudo vgs
sudo lvs
After that the installer exposed the logical volumes. We selected the existing root LV for /, the swap LV for swap, and kept the separate /boot. The old Linux filesystems were reformatted; the XP partition and the space reserved for the BSDs were preserved.
Desktop, login screen and language
IceWM was a practical choice, even though we discussed EMWM, Window Maker and other ways of achieving a late-1990s Unix-workstation appearance.
The login screen was Slimski, not XDM and not an installation using the old /usr/share/slim/themes directory. The actual files were:
/etc/slimski.conf
/etc/slimski.local.conf
/usr/share/slimski/themes/
The local configuration selected the theme. We created a canica-unix theme for 1024×768 and got it working, though the input-field alignment and some artwork still needed refinement. The login background and IceWM’s desktop wallpaper are separate settings; seeing the login image remain after signing in did not mean they had to share a wallpaper.
I wanted English messages with a Spanish keyboard. Locale and keyboard layout are independent, so the English locale was generated and selected with:
sudo dpkg-reconfigure locales
sudo update-locale LANG=en_US.UTF-8
The keyboard configuration already contained Spanish and US layouts:
XKBMODEL="pc105"
XKBLAYOUT="es,us"
XKBVARIANT="winkeys,"
XKBOPTIONS="grp:lalt_lshift_toggle,grp_led:scroll,terminate:ctrl_alt_bksp"
A stubborn warning turned out to come from the SSH client’s environment:
LANG=en_US.UTF-8
LC_CTYPE=UTF-8
UTF-8 alone was not a valid locale name on the target. Connecting with an explicit locale avoided it:
LC_CTYPE=en_US.UTF-8 ssh retro@192.0.2.69
That is a much more useful diagnosis than repeatedly rebuilding a locale that was already installed correctly.
Applications and networking
The Full image provided a useful starting desktop: Firefox ESR, LibreOffice, Claws Mail, Geany, XMMS, and file-management tools including zzzFM and ROX-Filer. These are bundled applications, rather than a list of programs we individually installed and tested. The 32-bit edition uses ALSA by default, and includes ConnMan and Ceni for networking, according to the release notes.
We explicitly added lvm2 for installation and customised Slimski. We also discussed using Thunar without adopting the whole Xfce desktop. Unlike the later NetBSD Thunar installation, the antiX discussion does not include a completed package-install log. To add it there:
sudo apt update
sudo apt install thunar thunar-archive-plugin xarchiver
Ethernet and SSH worked in the installed system, and antiX powered the laptop off correctly. This was a welcome change from the earlier Debian shutdown behaviour, where the machine could remain powered with its fan running.
The old Debian kernel also lacked the ppa and imm modules for the parallel Zip drive. That was a finding about that kernel build, not proof that every Linux distribution lacks support. We did not complete an equivalent antiX Zip-driver test.
GRUB and the BSD entries
After installing NetBSD, os-prober produced misleading results:
Found Microsoft Windows XP Professional on /dev/sda1
Found unknown Linux distribution on /dev/sda3
Found unknown Linux distribution on /dev/sda7
Linux was also exposing parts of the BSD disklabel, which made the extra name confusing. We did not use those automatically guessed entries. Instead, we added explicit chainloaders to /etc/grub.d/40_custom, preserving its first two script lines:
#!/bin/sh
exec tail -n +3 $0

menuentry "NetBSD 11.0 i386" {
    insmod part_msdos
    set root=(hd0,msdos3)
    chainloader +1
}

menuentry "OpenBSD 7.9 i386" {
    insmod part_msdos
    set root=(hd0,msdos4)
    chainloader +1
}
Then:
sudo update-grub
Both BSD entries were subsequently boot-tested successfully. The important maintenance file is 40_custom; editing the generated grub.cfg would lose changes the next time it was regenerated.
Keeping antiX up to date
Here the kernel and applications are managed through Debian-style packages, unlike the separate base-system and package updates on the BSDs. The recurring routine is:
sudo apt update
apt list --upgradable
sudo apt full-upgrade
sudo dpkg --audit
sudo apt-get check
Read the proposed changes before accepting them: full-upgrade can remove packages to resolve dependencies. Resolve any errors before considering the pass finished.
After kernel-related updates, verify the available images and regenerate the menu if necessary:
dpkg -l 'linux-image*'
ls -lh /boot
sudo update-grub
sudo reboot
After rebooting:
uname -r
sudo apt update
apt list --upgradable
The small /boot needs watching as kernel images accumulate. Keep the running kernel and a known-good fallback before removing older images. Also check antiX’s kernel-update announcements: updating installed packages alone does not prove that a separately named replacement kernel package has been installed.
This is the repeatable maintenance recipe for the build. Unlike the BSD passes below, our saved antiX conversation does not contain a final full-upgrade transcript, so I am not presenting it as a measured “zero updates remaining” result.
NetBSD 11.0 i386
Installation media and disk layout
Ventoy loaded the NetBSD kernel, but the installer could not find its root device:
boot device: <unknown>
root device:
Trying a root device produced:
root on sd0a
vfs_mountroot: can't open root device
cannot mount root, error = 6
Loading the ISO into memory did not resolve the problem. The working route was the native NetBSD-11.0-i386-install.img.gz USB image from the official images directory.
On another Linux computer, decompress it, identify and unmount the target USB stick, then write the whole-device image:
gunzip NetBSD-11.0-i386-install.img.gz
lsblk
sudo dd if=NetBSD-11.0-i386-install.img of=/dev/sdX bs=2M status=progress conv=fsync
sync
Here /dev/sdX must be replaced with the USB stick’s whole-device name, not one of its partitions and certainly not the X60’s internal disk. The image overwrites that USB device.
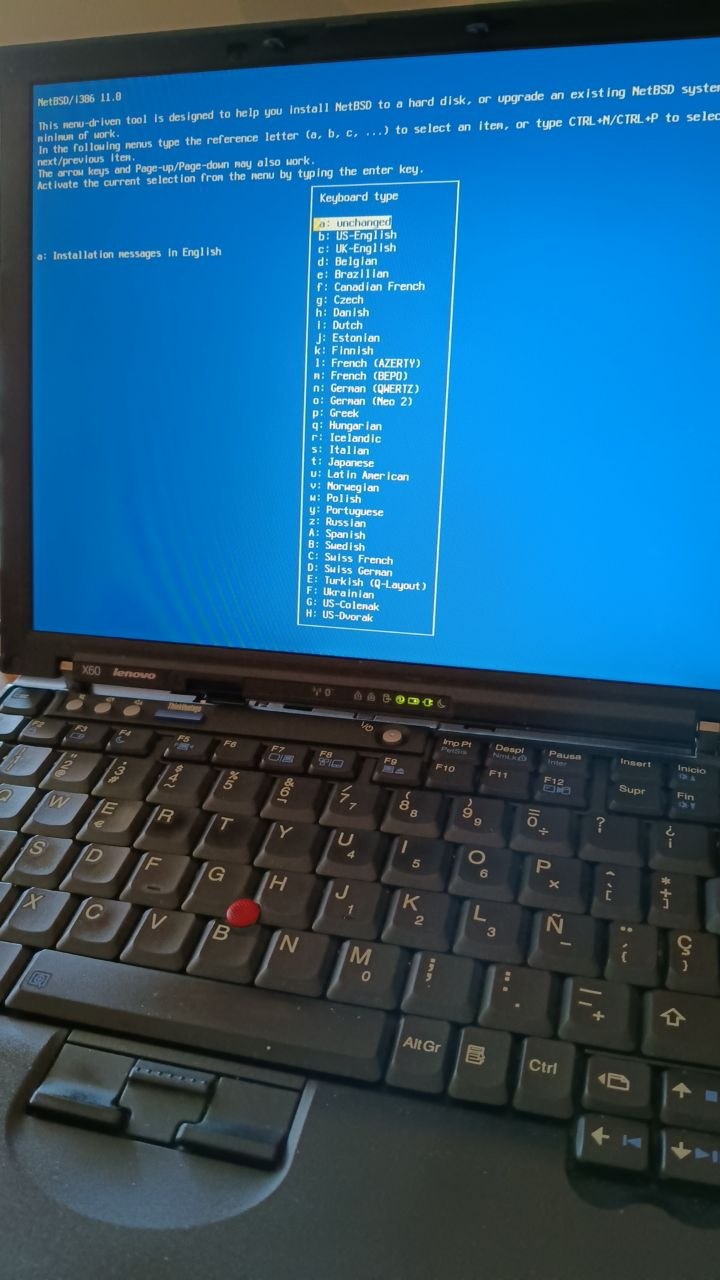
Inside sysinst, we created the 32 GiB primary A9 partition and then a simple 30 GiB FFSv2 root filesystem plus approximately 2 GiB swap. One screen described the entire 149 GiB disk, which was alarming; we checked the manual partition editor and confirmed that the actual allocation was confined to the intended 32 GiB area before proceeding.
We selected the full installation, including X11, and processed all 18 sets. We configured wired DHCP through wm0, the normal user, SSH and XDM, and fetched the pkgsrc tree. The existing GRUB MBR remained in charge; the custom NetBSD chainloader above completed the boot path.
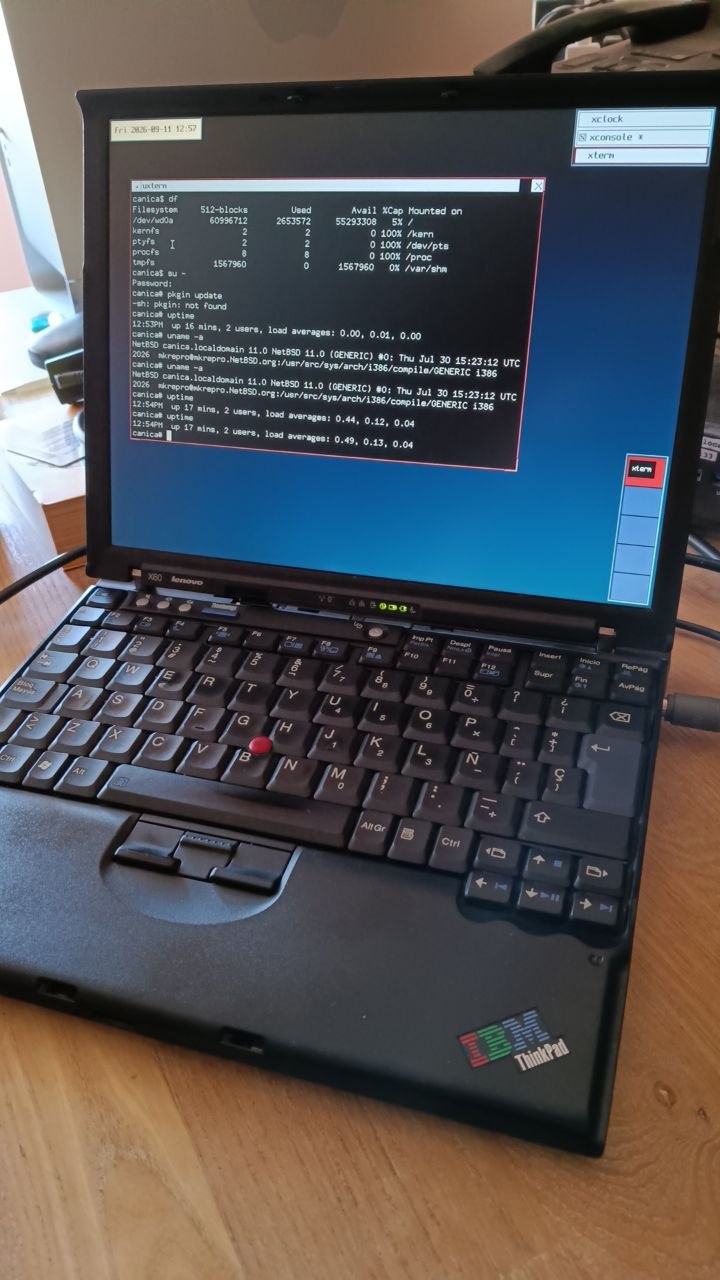
The first installed kernel identified itself as:
NetBSD 11.0 (GENERIC) #0: Thu Jul 30 15:23:12 UTC 2026
Bootstrapping binary packages
Selecting binary-package support during installation had not left us with a working pkgin command:
canica# pkgin update
-sh: pkgin: not found
pkg_add was available, but PKG_PATH was commented out in root’s profile. We enabled the appropriate repository and installed pkgin:
export PKG_PATH="https://cdn.NetBSD.org/pub/pkgsrc/packages/NetBSD/i386/11.0/All"
pkg_add pkgin
/usr/pkg/bin/pkgin update
That installed pkgin 26.2.0. Its repository configuration lives in:
/usr/pkg/etc/pkgin/repositories.conf
It is important to match the OS release and architecture, rather than borrowing an amd64 repository because it has a more attractive application list. NetBSD’s first-boot guide explains the package bootstrap.
Browser, mail and desktop applications
We began with:
pkgin install audacious claws-mail basilisk netsurf
pkgin install audacious-plugins
The browser query was revealing:
basilisk-2025.10.10nb2
firefox52-52.9.0nb80
We chose Basilisk and confirmed that it launched. Later it also played an HTML5 audio test successfully. Firefox 52 appeared in the repository, but was not our chosen browser. Thunderbird and SeaMonkey were absent from the configured i386 binary repository.
The resulting application selection included:
| Application | Version recorded | Result |
|---|---|---|
| Basilisk | 2025.10.10nb2 | Launched; HTML5 audio worked |
| NetSurf | Installed | Lightweight alternative |
| Claws Mail | 4.3.1nb33 | Installed; mail/OAuth account setup still pending |
| Audacious | 4.1nb29 | Installed with plugins; crashed during GUI rendering |
| XMMS | 1.2.11nb6 | Tried as an alternative; also unstable |
| MikMod | 3.2.9 | Successful MOD playback |
| Thunar | 4.20.7 | Installed with archive integration |
| Vim | 9.2.0496 | Installed |
| Geany | 2.1nb3 | Installed |
Thunar and the editors were added later:
pkgin install xfce4-thunar xfce4-thunar-archive-plugin xarchiver
pkgin install vim geany
Thunar brought a substantial collection of Xfce and other supporting libraries. That did not mean we had switched the whole desktop to Xfce, or that every newly installed service should be enabled. From the graphical session, the file manager is simply:
/usr/pkg/bin/thunar
We used XDM and the initial X session, with uxterm. Window Maker and EMWM were discussed, but there is no confirmed NetBSD switch to either in this build. uxterm’s scrollback also deserved attention; it was a terminal configuration issue, rather than evidence that a new terminal package had already been installed.
Audio works; the players were another matter
The hardware was detected cleanly:
canica# audiocfg list
0: [*] audio0 @ hdafg0: Analog Device AD1981HD
       playback: 16, 2ch, 48000Hz
       record:   16, 2ch, 48000Hz
Audacious first needed its separate plugins package. After installing that, it still failed:
render glyph failed err=62
Segmentation fault (core dumped)
We ran it under GDB:
gdb /usr/pkg/bin/audacious
(gdb) run
(gdb) bt
The backtrace led to QFontEngineFT::loadGlyph() in libQt5XcbQpa.so.5, while drawing menu text. Our combination was Qt 5.15.18nb3, FreeType 2.14.3, and Audacious 4.1nb29. Rebuilding font caches and changing fonts did not resolve it. The evidence pointed to the GUI font-rendering path, not to an audio-driver failure.
XMMS was no rescue. Playing a module crashed inside its MikMod input integration:
#0  0x00000000 in ?? ()
#1  ... in _mm_init () from /usr/pkg/lib/libmikmod.so.3
#2  ... from /usr/pkg/lib/xmms/Input/libmikmod.so
It also crashed when I selected double size. At that point, I stopped trying to make it our dependable player.
The satisfying test was much simpler:
pkgin install mikmod
mikmod phantasmagoria.mod
The module came from The Mod Archive, and it played nicely. Basilisk’s HTML5 audio test worked too. We had demonstrated working NetBSD audio through two independent applications without downgrading shared libraries to rescue Audacious.
The internal modem was less successful. The log contained:
hdvsmfg at hdaudio0 not configured
The modem function was detected, but no usable modem driver attached. Working HDA sound did not imply a working HDA softmodem.
Ethernet: measure the LAN, not just a download mirror
Slow package downloads initially made the network look suspicious. wm0 nevertheless reported 1000baseT full-duplex. The Python Speedtest client also chose unhelpful distant servers and did not share the current official client’s server list.
A local iperf3 test was more useful. On another LAN machine, run iperf3 -s; on the X60:
pkgin install iperf3
iperf3 -c 192.0.2.3
iperf3 -c 192.0.2.3 -P 4
The single-stream receiver result was about 395 Mbit/s. With four streams:
[SUM]   0.00-10.02  sec   858 MBytes   719 Mbits/sec    0   sender
[SUM]   0.00-10.03  sec   858 MBytes   718 Mbits/sec        receiver
That is 718 Mbit/s aggregate received throughput, with zero sender retransmissions. We discussed repeating the test under antiX, but did not record that comparison.
The local network also lacked routed IPv6 connectivity. Failed IPv6 attempts before IPv4 fallback were a separate issue from Ethernet link speed.
Wi-Fi: test first, then make it permanent
For WPA2-Personal, we used NetBSD’s native wpa_supplicant. First bring up the interface and scan:
ifconfig wpi0 up
ifconfig wpi0 list scan
Create a temporary configuration with wpa_passphrase. With the password omitted from the command line, enter it through standard input when requested:
umask 077
wpa_passphrase "RETRO_WIFI" > /tmp/wpa.conf
vi /tmp/wpa.conf
Remove the commented plaintext #psk= line and keep the generated psk= value. That generated value is still a credential and must also remain private.
Our first attempt produced two messages like:
ioctl[SIOCS80211, op=20, val=0, arg_len=7]: Invalid argument
Also, wpa_cli could not connect: we had not configured a control socket. Neither message alone established that authentication was impossible. After stopping the earlier supplicant instance, we tested in the foreground:
wpa_supplicant -D bsd -d -i wpi0 -c /tmp/wpa.conf
The log reached CTRL-EVENT-CONNECTED and completed the WPA handshake. From a second root shell:
dhcpcd -qM wpi0
ifconfig wpi0
netstat -rn -f inet
ping -c 3 192.0.2.1
ping -c 3 netbsd.org
Once the temporary test worked, we stopped the foreground supplicant and installed the configuration:
cp /tmp/wpa.conf /etc/wpa_supplicant.conf
chown root:wheel /etc/wpa_supplicant.conf
chmod 600 /etc/wpa_supplicant.conf
The relevant /etc/rc.conf settings are:
dhcpcd=YES
dhcpcd_flags="-qM wm0 wpi0"
wpa_supplicant=YES
wpa_supplicant_flags="-D bsd -i wpi0 -c /etc/wpa_supplicant.conf"
The boot-tested version also included -B in wpa_supplicant_flags. Process inspection showed it twice because the rc script already supplied it; the block above incorporates the subsequent cleanup advice. We did not create a competing /etc/ifconfig.wpi0 file.
After rebooting, Wi-Fi associated automatically and Ethernet remained the default route. Then I unplugged Ethernet: the default route moved to wpi0, and both the gateway and netbsd.org answered three pings with no loss. Automatic wired-to-wireless failover was confirmed. An existing SSH session addressed to the wired interface does not magically move to the wireless address, of course.
We also wanted booting to remain possible without the configured network. That was a configuration requirement; the separate cold-boot test with both Ethernet and the access point unavailable was not recorded.
Keeping NetBSD up to date
NetBSD maintenance has two different parts: pkgsrc applications and the base operating system.
For the packages, this is the full pass we performed as root:
pkgin update
pkgin full-upgrade
pkg_admin fetch-pkg-vulnerabilities
pkg_admin audit
The result contained a particularly important contrast:
canica# pkgin full-upgrade
nothing to do.
But the vulnerability audit still listed problems in installed packages, including Claws Mail, NetSurf and supporting libraries. “Nothing to do” meant there were no newer packages in our configured repository. It did not mean that every known vulnerability had been fixed. The NetBSD security documentation describes these as separate checks.
The audit remained an open issue. The next action is to review the affected packages and advisories, look for fixed packages or a coherent pkgsrc update, and remove or avoid affected applications where appropriate. We did not repair that entire report during this session.
For the base system, pkgin full-upgrade does not replace /netbsd or the base userland. We kept the formal 11.0 installation; there was no OpenBSD-style syspatch pass that silently patched those binaries.
The ongoing base-system drill is to check NetBSD security advisories, apply the relevant documented remedy, and plan an upgrade when suitable release or stable-branch sets are available. If an applicable fix is only available in source, it needs the documented source-build procedure or an appropriate updated build; waiting for the next formal release is not itself a security fix.
For a future binary upgrade, read the target release’s INSTALL notes, back up the system, and use either the installer’s Upgrade operation or pkgsrc’s sysupgrade. The upgrade guide explains both. A same-series upgrade has this general form, with RELEASE replaced by an actually published and verified target:
pkgin install sysupgrade
sysupgrade auto https://cdn.NetBSD.org/pub/NetBSD/NetBSD-RELEASE/i386
shutdown -r now
Review configuration merges and any postinstall failures, then verify uname -a, the package repository, and rerun the package update and audit. Across major releases, follow the guide’s kernel/modules-first reboot sequence instead of blindly applying the abbreviated example. No such release upgrade was performed in this build.
Finally, full hardware power-off was tested successfully:
shutdown -p now
OpenBSD 7.9 i386
Installation
OpenBSD was installed last, using Ventoy’s load ISO into memory mode. In this case it reached the installer successfully. We used wired networking and downloaded the installation sets from an HTTP mirror.
Our choices included the Spanish keyboard, hostname canica, em0 with IPv4 autoconfiguration, SSH, a normal user, and xenodm for graphical login. Root SSH login was disabled. We did not configure IPv6 during installation because the network had no routed IPv6 connectivity.
The disk-selection default was a trap: it offered sd0, but that was the SD card. Asking for details showed:
sd0: SD/MMC                         14.6G
sd1: Kingston DataTraveler 2.0      58.6G
wd0: Fujitsu MJA2160BH G2          149.1G
We selected wd0, no root-disk encryption, and Edit the MBR, preserving XP, antiX and NetBSD. OpenBSD’s fdisk numbers the four primary entries 0–3, so its entry 3 is Linux’s /dev/sda4.
The new partition was type A6, starting at sector 246772152, with 65809656 sectors. That is exactly after NetBSD’s end and extends to the end of the physical disk.
The automatic OpenBSD layout proposed many separate filesystems. For approximately 31 GiB, I preferred the simpler arrangement already used on NetBSD. We briefly started a more fragmented manual layout, then abandoned it. Ctrl+C exited the editor into a shell and restarting the installer was necessary; the already-written A6 MBR entry remained intact.
On the second pass we chose use the OpenBSD area, then a custom disklabel:
  partition      sectors     offset       type      mount
  a             60819048    246772152     4.2BSD    /
  b              4990608    307591200     swap
  c            312581808            0     unused
That gives approximately 29 GiB root and 2.38 GiB swap. c describes the whole disk; it is not another filesystem to format. The foreign partitions listed as i, j and k were left alone.
The simpler layout avoids running out of one small filesystem while another has spare space. The tradeoff is losing some of the separate mount-policy and space-isolation benefits of OpenBSD’s default layout.
All sets, including X11, were installed. At the end:
Multiprocessor machine; using bsd.mp instead of bsd.
fw_update: add intel,inteldrm,wpi; update none
Relinking to create unique kernel... done.
Back in antiX, we added the OpenBSD GRUB entry and ran update-grub. OpenBSD then booted successfully into xenodm; graphical login, Ethernet and SSH all worked.
From the default desktop to FVWM3
The initial session used OpenBSD’s base FVWM. We compared the packaged alternatives:
emwm-1.3p0
emwm-utils-1.3p2
fvwm2-2.7.0p0
fvwm3-1.1.0p0
I chose FVWM3. It retained the classic workstation feel while using the newer FVWM line. We installed it as root:
pkg_add fvwm3
Then, as the normal user, created ~/.xsession:
#!/bin/sh
exec /usr/local/bin/fvwm3
And made it executable:
chmod +x ~/.xsession
Logging out of FVWM through its desktop menu and back into xenodm started FVWM3 successfully. There was no need to reboot for this change.
doas was not configured on this fresh installation:
doas: doas is not enabled, /etc/doas.conf: No such file or directory
We therefore used su - for administrative work. A doas configuration was discussed, but was not added during these steps.
Applications: the i386 repository decides
The general OpenBSD application catalogue looked promising, but the repository for our architecture was the deciding factor:
canica# pkg_info -Q firefox
canica# pkg_info -Q chromium
chromium-bsu-0.9.16.1p4
canica# pkg_info -Q basilisk
BasiliskII-1.0p13
chromium-bsu is a game, and BasiliskII is a Macintosh emulator. Neither result supplied the browser we were looking for. Thunderbird was absent too.
The installation command became:
pkg_add netsurf dillo audacious audacious-plugins mikmod vim geany claws-mail
For Vim we selected the plain terminal flavour, and for Claws Mail the normal non-LDAP flavour.
| Application | Recorded package |
|---|---|
| FVWM3 | 1.1.0p0 |
| NetSurf | 3.11p2 |
| Dillo | 3.2.0p0 |
| Audacious | 4.5.1 |
| Audacious plugins | 4.5.1p0 |
| MikMod | 3.2.9 |
| Vim | 9.2.1010 |
| Geany | 2.0p0 |
| Claws Mail | 4.4.0 |
Installation completed successfully. NetSurf and Dillo were useful for simple pages, but did not provide the JavaScript-heavy web experience I wanted. On this particular machine, NetBSD’s Basilisk was the more capable BSD browser option.
For audio, the same test worked:
mikmod phantasmagoria.mod
Audacious 4.5.1 was installed, but its playback test was still pending when we moved back to NetBSD. Likewise, installing Claws Mail was not yet proof of a working OAuth-configured mail account. Thunar was installed on NetBSD; there is no corresponding OpenBSD Thunar installation in this session.
Wi-Fi with the native tools
OpenBSD’s WPA2-Personal configuration was pleasantly short. The first scan failed because the interface was down; bring it up first:
ifconfig wpi0 up
ifconfig wpi0 scan
ifconfig wpi0 join "RETRO_WIFI" wpakey "YOUR_WIFI_PASSWORD"
ifconfig wpi0 inet autoconf
ifconfig wpi0
netstat -nr
The interface associated and received an IPv4 address. The routing table showed Ethernet preferred over Wi-Fi, with default-route priorities 8 on em0 and 12 on wpi0.
For persistence, /etc/hostname.wpi0 contains:
join "RETRO_WIFI" wpakey "YOUR_WIFI_PASSWORD"
inet autoconf
Protect it and, when needed, apply it without rebooting:
chown root:wheel /etc/hostname.wpi0
chmod 600 /etc/hostname.wpi0
sh /etc/netstart wpi0
I confirmed making this permanent. Additional known networks can be added as further join lines. The native hostname.if format handles this without installing a graphical network manager or a WPA supplicant for this Personal-mode connection.
The explicit cable-unplug failover test in our record was performed on NetBSD. OpenBSD’s recorded result was successful association plus the preferred wired route alongside the wireless one.
Keeping OpenBSD up to date
Here we completed the full release-maintenance pass, including a reboot and a check of the running kernel.
First, as root, apply the base-system patches and inspect the installed list:
syspatch
syspatch -l
reboot
syspatch handles the official release’s binary base-system patches. syspatch -c lists available patches; it does not install them.
After rebooting, uname -a gave a short version string. The command that showed the build date was:
sysctl kern.version
Our updated running kernel reported:
kern.version=OpenBSD 7.9 (GENERIC.MP) #11: Thu Sep 10 09:54:11 MDT 2026
That was a concrete change from the original May build. We then updated firmware and packages separately:
fw_update
pkg_add -u
The firmware result was:
fw_update: add none; update none; keep intel,inteldrm,wpi
pkg_add -u checked the package repository and required no upgrades at that stage. Later application installs reported their additional package READMEs under /usr/local/share/doc/pkg-readmes/; those are worth reading before enabling services or expecting desktop integration.
The recurring routine is therefore syspatch, reboot when required, fw_update, pkg_add -u, followed by checking the results. These update different components; none replaces all the others.
Moving to the next OpenBSD release is a separate operation. After reading its upgrade guide and making backups, sysupgrade downloads and verifies the new sets and normally reboots into the upgrader. On this multiboot laptop, select the OpenBSD GRUB entry when it restarts so OpenBSD’s bootloader can complete that process. Then follow the release-specific post-upgrade steps and repeat syspatch, fw_update and pkg_add -u. We did not perform a release upgrade beyond 7.9 here, and did not switch to snapshot packages.
For everyday shutdown, the command is:
shutdown -p now
For a restart:
shutdown -r now
The System-V habit of typing init 6 was not the right interface here.
Where we ended up
This X60 now boots Windows XP Professional SP3, antiX 26, NetBSD 11.0 and OpenBSD 7.9 from the same disk, with antiX’s GRUB providing the common menu.
XP gives the old peripherals and period applications a useful home. antiX gives us a practical 32-bit Linux desktop. NetBSD has working networking, good measured Ethernet throughput, Basilisk, Thunar and successful audio playback, together with some very visible application-library problems. OpenBSD has a working FVWM3 desktop, simple wireless configuration and a particularly clear separation between base patches, firmware and packages; modern browser availability on i386 was its biggest disappointment.
There are still things to revisit: the NetBSD vulnerability report, a dependable graphical audio player there, OpenBSD’s Audacious test, actual mail-account configuration, and the remaining hardware and cosmetic issues. Those are the next experiments, rather than successes to claim in advance.
But the original objective has been reached. Four systems, a twenty-year-old laptop, and a parallel Zip drive with files still worth reading. That seems like a good place to stop for lunch. 
Comments